Steps you need to take to add a new policy, procedure, agreement, or terms to your Clym widget
Clym recognizes the importance of providing your users with easy access to your legal documents such as terms, agreements, and policies, and equips your widget with the ability to display all of these to your users in one central location. Adding new documents is a simple 3-step process:
Note: If you already have added your documents and are looking to edit your content or add a new version, please see:
1. Log into the Clym admin
You should have received a magic link in your initial onboarding email. Please click Sign in from the email to get started. Alternatively, navigate to Clym's home page and click on Sign in in the upper right-hand corner.
2. Select your property (domain)
Navigate to the Properties menu option and then select your domain.

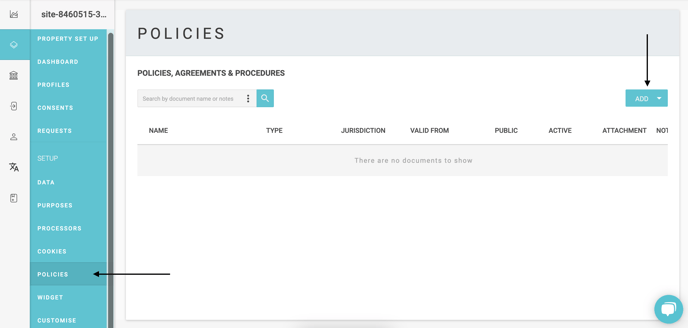
3. Add new documents
From the left-hand side menu, select Policies. Click Add, and select the type of document you are adding: Policy, Procedure, Agreement, or Terms.
In the pop-up window that appears, complete the fields required for that document type by adding a name, valid from date, and body text. Click Save. After you have added the new document to your Clym account, it will be visible and available to your users depending on specific settings you have saved for document visibility by region. 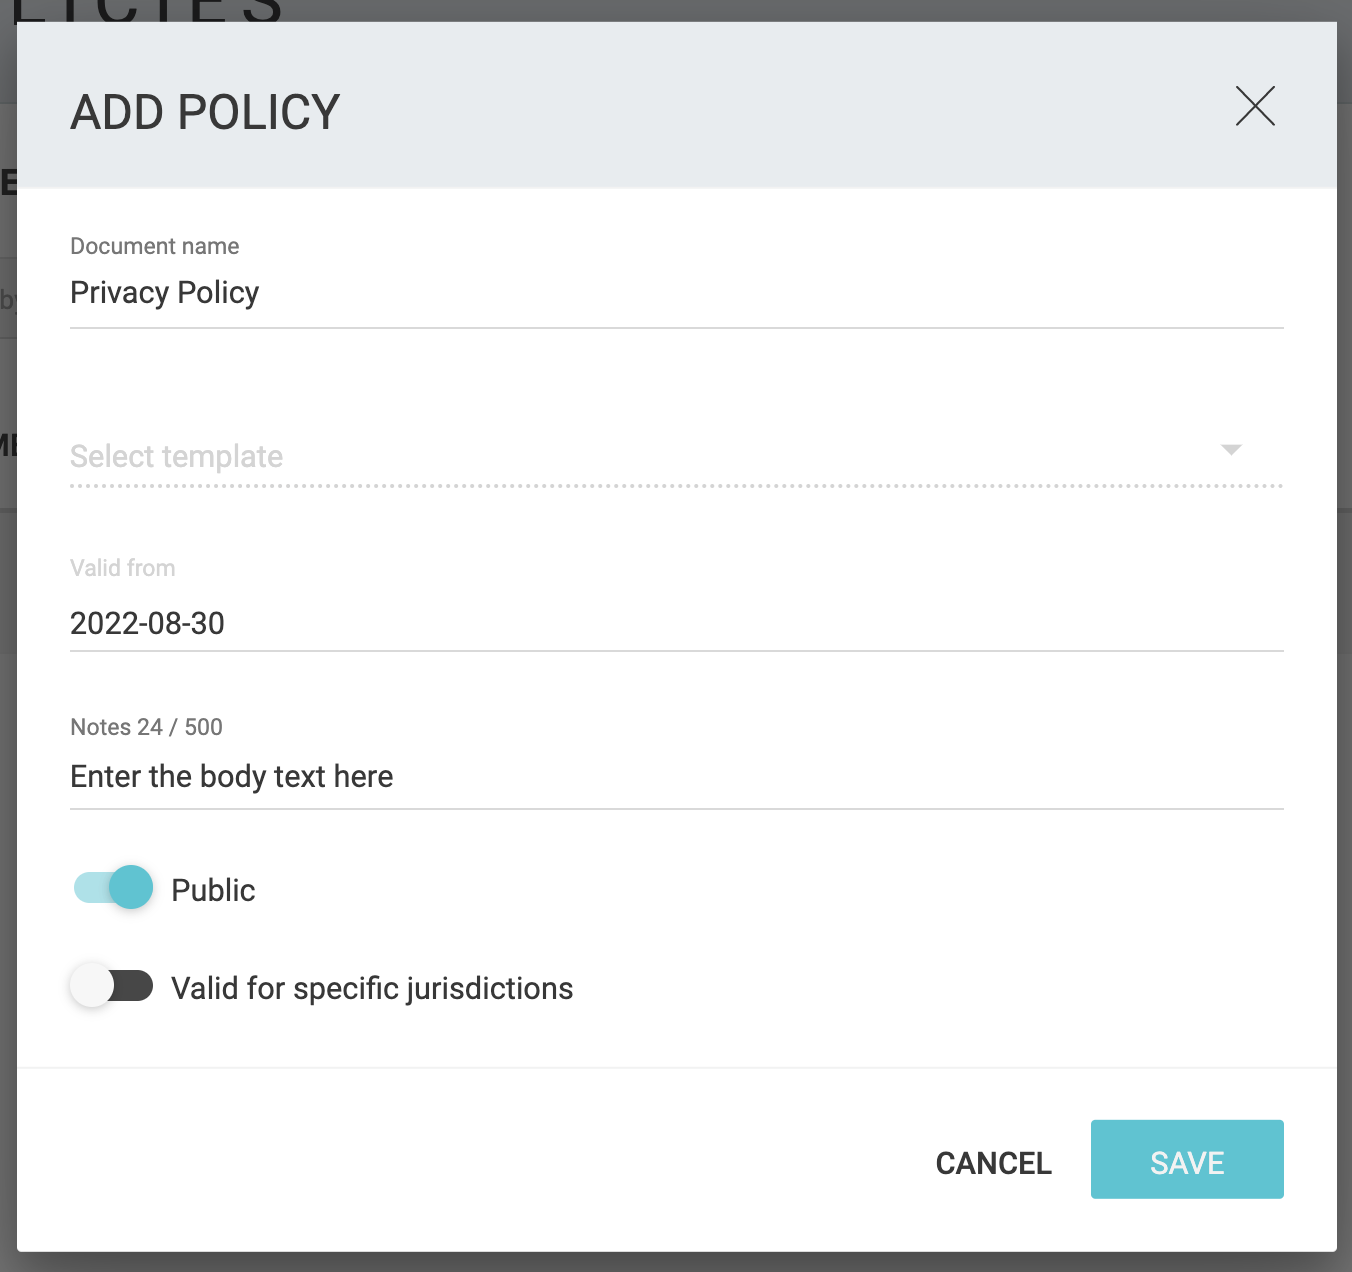
Please note, if you come across any challenges, you can reach out to us via chat or email us at support@clym.io.